
Table of Contents
Introduction
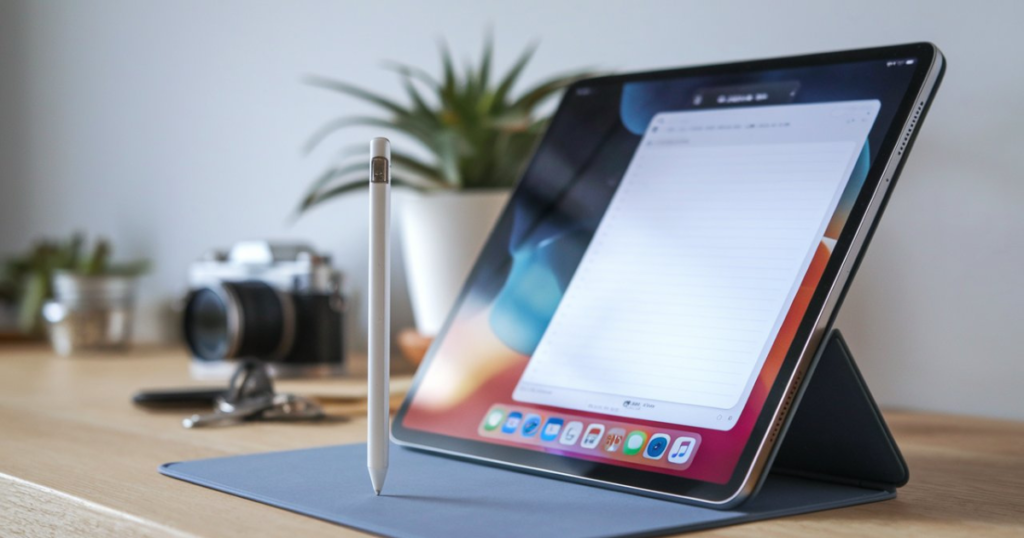
Apple Pencil, a stylus designed to work alongside Apple iPad devices, brings digital experiences into new territories of precision and versatility. This will then bring a more overall user experience, whether sketching, note-taking, or dealing with iPad interfacing. But, you will need to connect it properly with the iPad to unlock its full potential. In this one, you are going to learn how to Pair Apple Pencil with an iPad.
That is why if you are going to attach an Apple Pencil to an iPad, then it must be borne in mind that the method can vary depending on the model of both devices. The apple pencils also exist in two generations and each of them requires a specific pairing method. The two different requirements for connecting both the Apple Pencil and the iPad mean that users have to identify which type of each they have before connecting them. Here are the steps one could use to link both generation Apple Pencils: Here are the steps one could use to link both generation Apple Pencils:
How to Pair Apple Pencil 1 with an iPad
Here is a simple step to pair an Apple Pencil 1 with an iPad
Check iPad Compatibility:
- Make sure the iPad supports Apple Pencil 1. The following models are supported: all versions of the 2020 iPad Pro, the 2018 refreshed version and newer low-end model, and every other recent base mannequin (6th-gen or neater)
Prepare the Apple Pencil:
- Take off the cap at the end of your Apple Pencil to expose a Lightning connector.
Connect the Apple Pencil:
- Simply plug the Lighting connector of the Apple Pencil into the Lightning port iPad Hold it in place so that you achieve a stable connection.
Wait for the Pairing Prompt:
- Slide the Apple Pencil into position and you should receive a prompt to pair with your iPad on screen in just a few seconds.
Confirm Pairing:
- When the dialogue box appears), click on the Pair button shown on your iPad screen Doing so will pair the Apple Pencil with your iPad.
Verify Connectivity:
- Now it’s pretty easy to test if the pairing has worked by trying some simple drawings or writings in any supported app using Apple Pencil.
Secure the Cap:
- Close the cap of your Apple Pencil to shield the Lightning connector end from dust or any sort of damage.
How to Pair Apple Pencil 2 with an iPad
Apple Pencil 2 pairing with an iPad is straightforward For the devices to connect successfully, you need to follow these steps: First off, it is very possible to pair Apple Pencil 2 with an iPad.
Compatible models:
- 11-inch iPad Pro (1st generation and later).
- iPad Pro 12.9-inch (3rd generation or later).
- iPad Air (4th generation or newer).
- iPad mini (6th generation).
Prepare the Devices:
- Make certain that your iPad is switched on with the most current OS known as iPad’s.
- For this to happen the first step is to ensure that Bluetooth is on in the iPad.
- Open the Settings app.
- Tap on “Bluetooth.”
- Slide the switch to turn Bluetooth on if it is not turned ON already.
Take Off Protections:
- If you have any covers or sleeves on your Apple Pencil 2, peel those off to make sure the connection is clean.
Attach the Apple Pencil 2:
- Just align the flat side of Apple Pencil 2 along the right edge of your iPad around the magnetic connector.
- Apple Pencil 2 should magnetically snap into place.
Complete the Pairing:
- The screen will prompt us to pair the Apple Pencil 2 with the iPad when we attach it.
- Now tap on “Connect”, which will make the iPad detect your Apple Pencil 2 and pair it.
Check the Battery Status:
- Check the Apple Pencil 2 charge level on iPadOSTo check how much battery is left in your device, swipe onto a Home screen and go to widget view by pressing from left or swiping right.
- There you will find the “Batteries” widget, which shows how much battery the Apple Pencil 2 has left.
How to Pair Apple Pencil with an iPad 10th Generation

Here is how you can pair an Apple Pencil to a new iPad 10th gen. Check the Apple Pencil compatibility and charge it if needed.
Check Compatibility:
- Verify that the Apple Pencil is compatible with iPad 10th gen Pair the second-generation Apple Pencil.
Prepare the Devices:
- To use an iPad (2nd, 3rd, or 4th gen) with an Apple Pencil, the iOS device needs to be powered On and have all updates in order.
- Check if Apple Pencil is charged. Charge it if the battery is low with a magnetic charging strip on one side of your iPad.
Pairing the Apple Pencil:
To connect Apple Pencil with iPad:
- The Apple Pencil attaches magnetically to the magnetic strip of your iPad.
- You will see a prompt on the iPad screen saying, “Bluetooth Pairing Request – Apple Pencil would like to pair with your iPad” — tap it.
- Now tap “Pair” to finally connect the iPad using your Apple Pencil.
Verify Connection:
- Open any application where you can use an Apple Pencil (i.e., Notes or Procreate) so that we are sure the connection is established.
- Attempt to write or draw on your screen Apple Pencil needs to be working properly.
Reconnecting the Apple Pencil:
when Apple Pencil disconnects
- Reattach the Pencil: do all the steps from how to attach your Apple Aenchyote with a connect being prompt.
- Charge Battery: If it doesn’t pair, the Apple Pencil might be out of battery.
How to Pair Apple Pencil with an iPad 9th Generation
This is how you can easily pair an Apple pencil with an iPad 9th generation as shown below; This article will help you to find quick ways on how you can pair and start using the Apple pencil on your iPad.
Checking Compatibility:
- To do this you have to ensure that the Apple Pencil or the first generation will work with an iPad 9th generation. Check the Apple Pencil model is correct for users.
Preparing the Apple Pencil:
- The Apple Pencil has a small removable cap on its end; if you unscrew it, lo and behold, there’s a Lightning connector!
- First, charge the Apple Pencil: If you have not been using your Apple pencil for a while or it is new then this may be because of less charging.
Connecting the Apple Pencil:
- Find and tap on the “Settings” app from your Home screen.
- Go to Settings and access the Bluetooth tab from there. Make sure that it is on!
Pairing Process
Insert the Apple Pencil:
- Connect the Apple Pencil via Lightning to the iPad. Customers will stick the Pencil’s Lightning end into an iPad’s port.
Confirm the pairing request:
- It will say the Apple Pencil is ready to be paired, and you tap on Pair. Tap “Pair” to confirm.
Wait for the pairing to be ready:
- It should only take you a few seconds to pair the devices.
Testing the Connection:
- Test with apps like Notes or any drawing app.
Begin using the Apple Pencil:
Then, just start using it (you will know your Apple Pencil is connected when you hit the screen.
Maintaining the Connection:
- If the Apple Pencil becomes disconnected, it should automatically reconnect with your iPad. If it is not, the user may have to go through pairing all over again.
- Make sure an iPad has Bluetooth enabled for the best connection stability.
How to Pair Apple Pencil 1 with an iPad 10th Generation
Carefully follow these steps to pair Apple Pencil 1 with the iPad 10th generation:
Check Compatibility:
- Check that the iPad 10th generation is at full battery.
- Make sure that your Apple Pencil 1 is also charged fully.
Remove the Cap:
- Remove the little cap from one end of your Apple Pencil.
- The Lightning connector is covered by the cap.
Plug into iPad:
- Plug your Apple Pencil into the Lightning port on your iPad.
Automatic Pairing:
- Once the Apple Pencil has successfully paired, a message will show up.
- On the iPad, tap on Pair to start the pairing.
Wait for Confirmation:
- Wait for the connection to be established.
- You will receive a message notifying you that the pairing has been successful.
Test the Connection:
- Use a note-taking app such as Apple Notes.
- Speak the language of words or drawings to ensure that the Apple Pencil connects.
Charging the Apple Pencil:
- Give it a little while connected to the iPad, so that your Apple Pencil has some charge.
- This widget appears to contain all the needed information summing with Apple Pencil battery status in Battery on iPad.
Using the Apple Pencil:
- The Apple Pencil, once paired can interact seamlessly with the iPad 10th generation.
- Access pressure sensitivity and tilt to draw.
How to pair Apple Pencil 2 with an iPad 10th Generation
Apple Pencil 2 is a handy tool if you’re using your iPad as a drawing tablet or a notepad, and it’s easy to set it up with the new generation of iPads.
Check Compatibility:
- Make sure you are using an Apple Pencil 2 and iPad 10th generation.
Prepare the Apple Pencil:
- Remove that cap and lay the lightning connector bare. Apple Pencil 2 has no cap as it magnetically attaches to the iPad for pairing and charging.
Enable Bluetooth:
- Go to the iPad’s Home screen.
- Open the Settings app.
- Tap on Bluetooth.
- Make sure that you have allowed Bluetooth. If not, toggle the switch to turn on Bluetooth.
Attach Apple Pencil:
- Put the flat side of the Apple Pencil to its magnetic connector on the right edge (landscape).
- The Apple Pencil will stick and start pairing automatically.
Accept Pairing:
- An on-screen prompt will appear to pair the Apple Pencil with the iPad.
- Tap on Pair.
Verify the Connection:
- After the connection, if successful a short animation may appear.
- The battery percentage of the Apple Pencil will now show up in the Batteries widget on the Home Screen or for some even Today View.
How to Charge Apple Pencil 2 using USB-C on your iPad
Step 1: Check Compatibility:
- Models compatible with iPad Pro, the fourth generation of iPad Air, and models after that have USB-C ports.
Step 2: Unpacking of Apple Pencil:
- Check that all the bits are there, the Pencil, together with any documentation.
Step 3: Locate the USB-C Port:
- Locate the USB-C Port on your iPad. This is typically at the bottom edge of a device when in portrait mode.
Step 4: Remove the Cap:
- Uncover the USB-C connector by removing the cap at one end of the Apple Pencil.
Step 5: Pair the Apple Pencil:
- As part of the preparation process, pairing the Apple Pencil and the particular iPad to be used in the course of the lesson will be done.
- The Apple Pencil is majorly done by plugging the connector end of the stylus into the USB-C of the Apple iPad.
Step 6: Pairing the Devices:
- After it connects, there should be a prompt on the iPad that demonstrates the Apple pencil is connected.
- All you need to do now is tap on the Pair button on your screen of iPad.
Step 7: Charge your Apple Pencil:
- Once attached to the iPad, it charges upstart charging the Apple Pencil
- It is ideal to leave it charging up before use.
Step 8: Take a look at the battery:
- The Battery status can be verified for the Apple pencil as follows.
- Swipe Right from the iPad Home Screen to get the “Today View”.
- Search for the battery widget which shows the percentage of charge in Apple Pencil.
Step 9: Separating the Apple Pencils:
- Reduce the likelihood of harm to the Apple Pencil by pulling out the Pencil from the USB-C port when charging or when pairing it with an iPad.
How to Pair Apple Pencil to iPad without Charging
However, for those that use Apple Pencil (2nd generation) in tandem with a particular iPad, pairing the two without the need to charge is not that complicated. Well below is how to do the pairing of the device in a very easy way.
Ensure Compatibility:
- The other factor that should be considered and should be of more importance when choosing an iPad is whether it supports Apple Pencil, the second generation.
- It can be acquired More models including iPad Pro 11-inch (1st & 2nd generation) / iPad Pro 12. 9–inch (iPad3, iPad4 / iPad Air (4 )).
Check Bluetooth Settings:
- Launch the Settings application on your iPad.
- Go to Bluetooth and make sure it is enabled.
Connect Apple Pencil to iPad:
- Connect the Apple Pencil to your iPad by simply placing it on the Side of your device).
- Apple Pencil is magnetic so it attaches right where you want and charges up!
Wait for the Pairing Notification:
- You should then see a notification on the screen that says an Apple Pencil was attached.
- The “Pair” button in the notification will just finish the pairing process.
Verify Connection:
- To test this, open up a supported app like Notes.
- Make sure the iPad understands and recognizes Apple Pencil for touch interactions.
Conclusion
Once you connect an Apple Pencil then along with your iPad and a few other features reveal the magic of productivity in creative ways. The process is simple, but it varies a bit based on whether you own an older or newer Apple Pencil and iPad. The older first-generation Apple Pencil, naturally, is less convenient here because pretty much all that generation can do to charge up the stylus is plug in a Lightning connector. At the same time, owners of the Apple Pencil 2nd generation get an option for magnetic wireless pairing.
In essence, the steps of connection would be:
Apple Pencil first-generation:
- Appropriately, the cap has to come off to reveal the Lightning connector.
- Connect the other end to your iPad’s Lightning Port.
- Simply tap Pair once you see this prompt on the screen.
- Replace the cap on your Apple Pencil when pairing is finished.
Apple Pencil 2nd generation
- Firstly, the user ought to ensure that Bluetooth is on the iPad.
- Then you should put the Apple Pencil of 2nd generation to the right side on your iPad’s magnetic strip.
- The entire process will be initiated and detected by the Apple iPad itself.
- Follow further instructions on the Bluetooth pairing prompt that appears on the Phone screen.
I was reading some of your articles on this site and I believe
this site is rattling instructive! Retain posting.Leadership
Thank You!